ADVICE AND INFORMATION TIPS, TRICKS AND USEFUL ADVICE
-
GENERAL ADVICE
-
BIKE SETUP
-
DOCUMENTS
-
INSURANCE
-
SECURITY BOND & EXCESS EXPLAINED
-
GPS, SAT-NAV AND DIGITAL MAPS
-
SELF-GUIDED TOUR NAVIGATION
-
BREAKDOWNS & SERVICE PLEDGE
-
CANCELLATION POLICY EXPLAINED
-
OTHER FEES, TOLLS, FINES ETC.
-
BOOKING TERMS & CONDITIONS
-
STATE GUIDE:
NEW SOUTH WALES
-
STATE GUIDE:
VICTORIA
-
STATE GUIDE:
QUEENSLAND
-
STATE GUIDE:
WESTERN AUSTRALIA
-
STATE GUIDE:
SOUTH AUSTRALIA
-
STATE GUIDE:
TASMANIA
-
STATE GUIDE:
NORTHERN TERRITORY
NAVIGATING WHILST ON YOUR MOTORCYCLE TOUR
This section is intended to give you a quick overview on how the navigation links for your tour should work, either via a BikeRoundOz Tour Centre login (if you have one) or the tour details you will have been provided with prior to the start of your tour.
There are a few general points to make note of but if you follow these instructions you’ll have a detour-free ride Down Under! You’re also at liberty to use whatever navigation system you like of course, even good old fashioned paper maps, the choice is yours!
VIDEO GUIDE:
STEP 1: OPEN YOUR SELF-GUIDED TOUR MAP DOCUMENT:
Open your self-guided tour map document which will have been sent to you by your BikeRoundOz representative prior to the start of your tour.
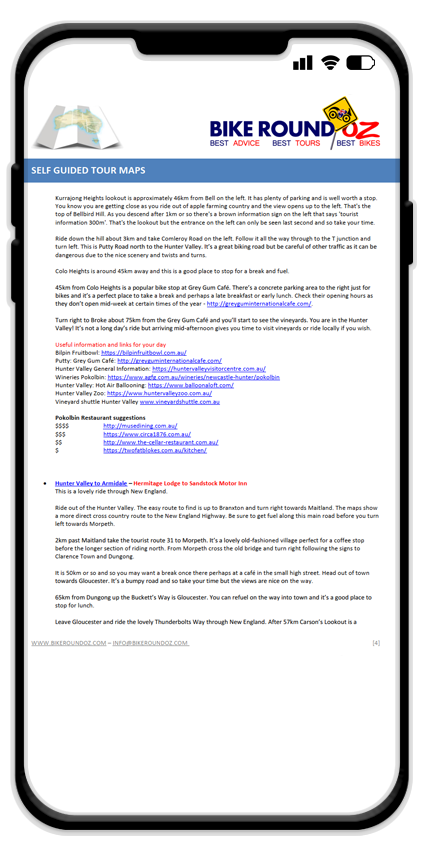
STEP 2: SELECT THE NAVIGATION LINK FOR THE RELEVANT DAY:
Find the day you wish to ride and select the relevant link. Tapping the link should open the route in your phone’s navigation app but if this isn’t the case or you encounter problems, move on to STEP3 below.
Otherwise you’re all good to move on to STEP 4.
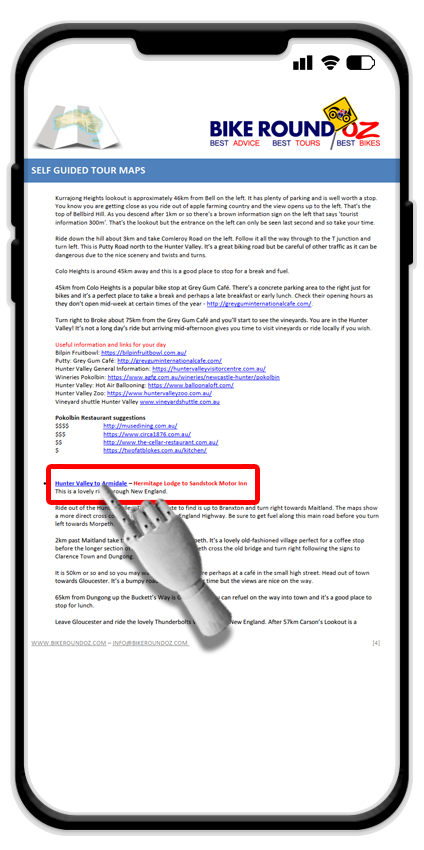
STEP 3: OPEN THE MAP LINK TO VIEW THE ROUTE (ALTERNATIVE):
If you’re using Firefox (or similar) as your mobile web browser or for some other reason the map doesn’t open correctly in the Google Maps app, then you may need to LONG PRESS on the link and select the option that reads ‘OPEN LINK IN EXTERNAL APP‘.
That should do the trick and you’re on to STEP 4.
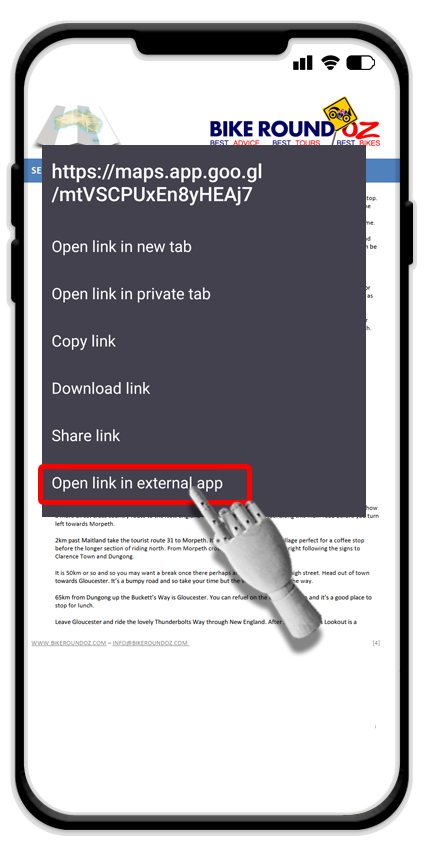
STEP 4: ROUTE IS DISPLAYED:
You’ll now be presented with the full route for the day you have selected. Your start accommodation will be preselected along with the evening stop for the specific section.
PLEASE NOTE:
If your LOCATION SERVICE is TURNED OFF, you will only be able to PREVIEW the route step by step using the button displayed.
If your LOCATION SERVICE is TURNED ON and / or you are TOO FAR from the start point for that day, you will also only be able to PREVIEW the route rather than navigate it in full.
This would apply for example if you were looking at the route maps in advance from the comfort of your own home somewhere in a different state or a country other than Australia.

STEP 5: ROUTE IS PREVIEWED:
If you are PREVIEWING the route you can run through each step by tapping on the ARROWS in the bottom right.

STEP 6: ROUTE IS NAVIGATED:
If you are close enough to the start point of the route, your locations services are turned on and you’re ready to ride, you’ll see the START option instead of PREVIEW.
Hit that button to begin the day!
When you are NAVIGATING the route you should follow along as you ride using the guidance provided.

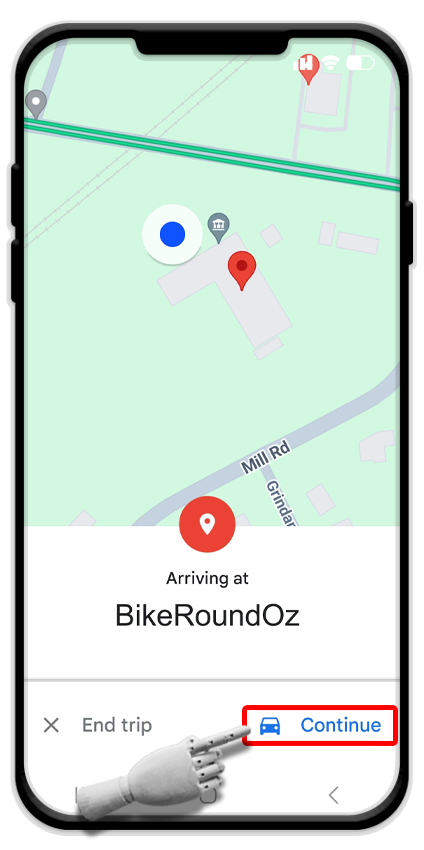
When you arrive at an important point / destination along the route such as a refuelling stop, scenic viewpoint or suggested place for lunch you’ll need to select the CONTINUE option for the navigation to carry on and lead you to the next point in the route.
This applies even if you decide to skip the suggested stop and carry on without taking a break, you’ll still need to pause briefly to select CONTINUE for the navigation to carry on.
STEP 7: ADJUSTING THE ROUTE / MISSING A STOP:
If you deviate from the planned route, either deliberately or because you missed a turn, Google Maps will still try to take you to the next intended stop.
If you’d like to skip that stop then you’ll need to remove it. You can do this by pulling over safely and tapping on the STOPS section at the top of the map screen.
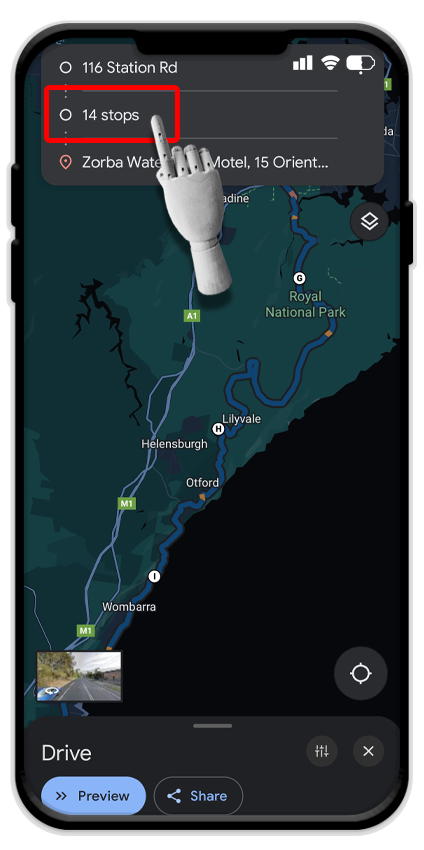
This will then display all the stops along the route. Simply tap the ‘X’ to remove it from the list. Google Maps will then re calculate and take you to the next stop on the list.

AN IMPORTANT NOTE:
The maps and routes have been meticulously planned and should display as intended, but we sometimes find ourselves working at odds with the mapping technology available. In some rare instances you may find that a route has a selection of alternatives displayed other than our main one; our advice: ignore those others and stick to the route we have researched, planned and entered for the tour.
Google Maps knows a lot, but they definitely don’t know much about planning the best route for a motorcycle tour in Australia, that’s our area of expertise.
Enjoy the ride!


